5. Managing Users
Managing Users, Adding a User, Ending a User
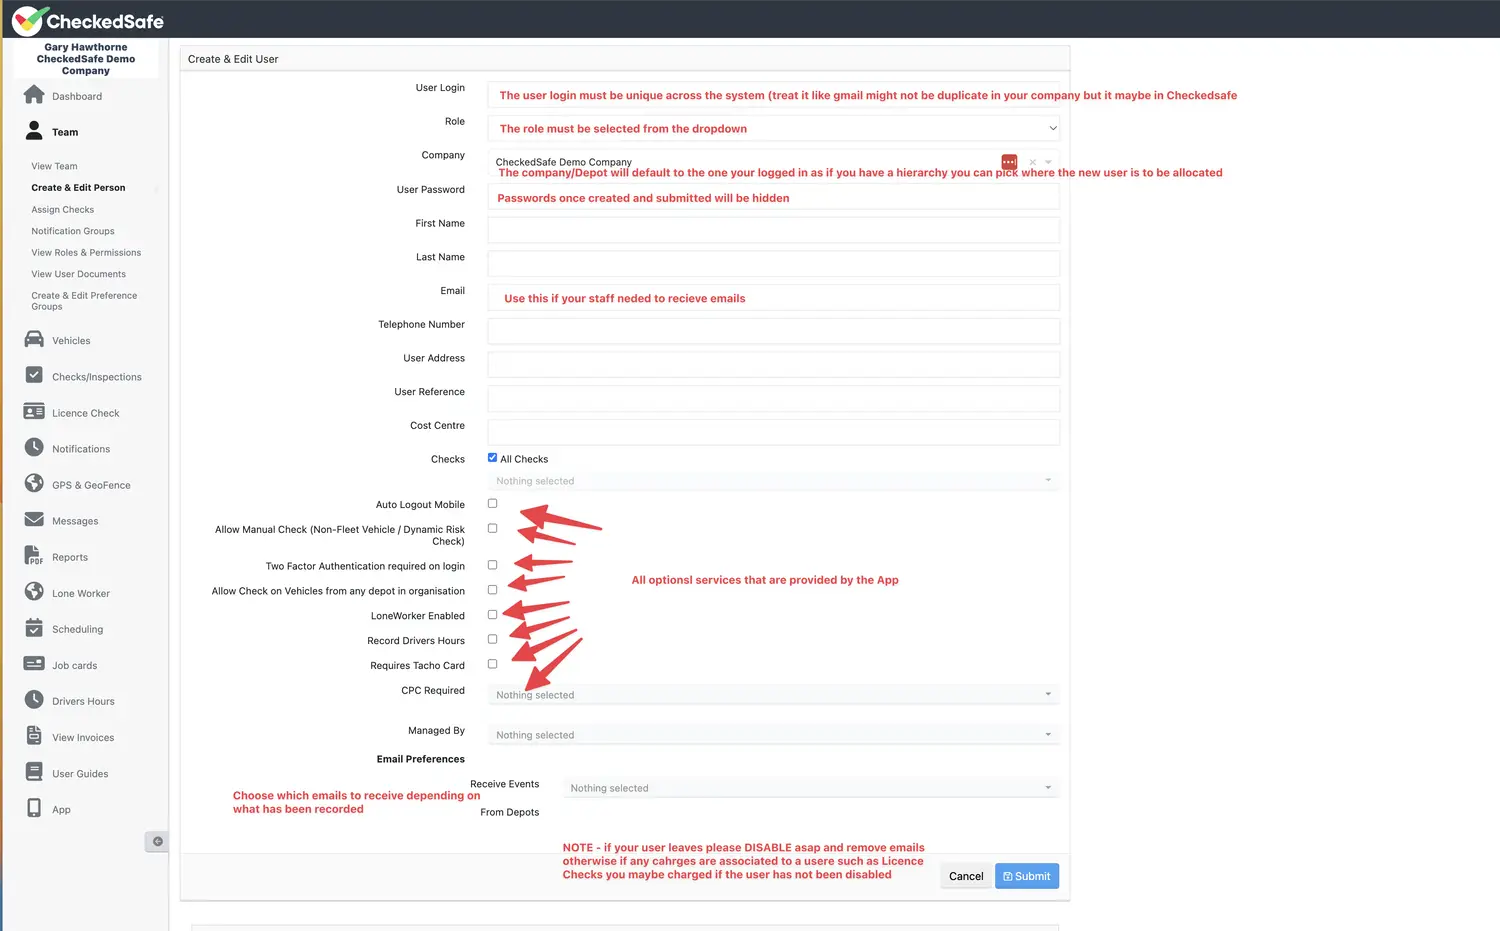
- The user login must be unique across the system (see note below) – treat us like gmail, may not be duplicate in your team but it maybe in CheckedSafe Group
- The role must be selected from the dropdown
- The company/depot/cost centre will default to the one your logged in as if you have a hierarchy you can pick where the new user is to be allocated
- Password should be set – it will auto hide once created
- The User Enabled box should be ticked – if they leave you just untick this box
- The other details should be entered as standard you can specify which templates the user can see and if they are a back office user, what emails they can receive
- If creating a Manager/Supervisor once you submit – additional options will appear (email schedules etc)
TIP: DO NOT overwrite the user if you want to add a new user as all historical data will then tag to the new user, if you want to add a new user, you must click again Create and edit User and you will see the screen as below
If you get a message “USER ALREADY IN THE SYSTEM” but you know you don’t have that person, it will be in the Global Checkedsafe system – think Gmail!
If you’re setting up a user who is a 3rd party and you’re using the Notification group to allow them to manage defects, see below: (Notification Groups) leave the email section blank in their profile – otherwise they will receive all emails and you can also edit their role and permissions which can be found further on in this section.
If you are using the licence check module, if you do not disable users when they leave you will be charged for a licence check on that user if they are set up. Therefore, please manage staff accordingly.
Assigning Check to Users
In this section you can tailor what users can see, this cuts down the margin for error. If you have lots of templates and not all users need them then you can assign templates to the user and this will cut down what they can see and use via the app

User documents
You can add documents to individual users and optionally push out to the app so the user can see them in the “documents tab” on the App, you can also track the amount of times the user has looked at the documents
Two options of how to do this:
Individually by user: find your user you wish to upload the document to and simply “Assign to the App. OR of you are for example loading a Staff Handbook that you need all the staff to see and also other generic documents you may wish to create a unique user such as docs@smithltd (example only) – load all the documents into that “User” and push out to app from there – this is really handy as you can track and store the core files in one place and also add a schedule reminder to update/review
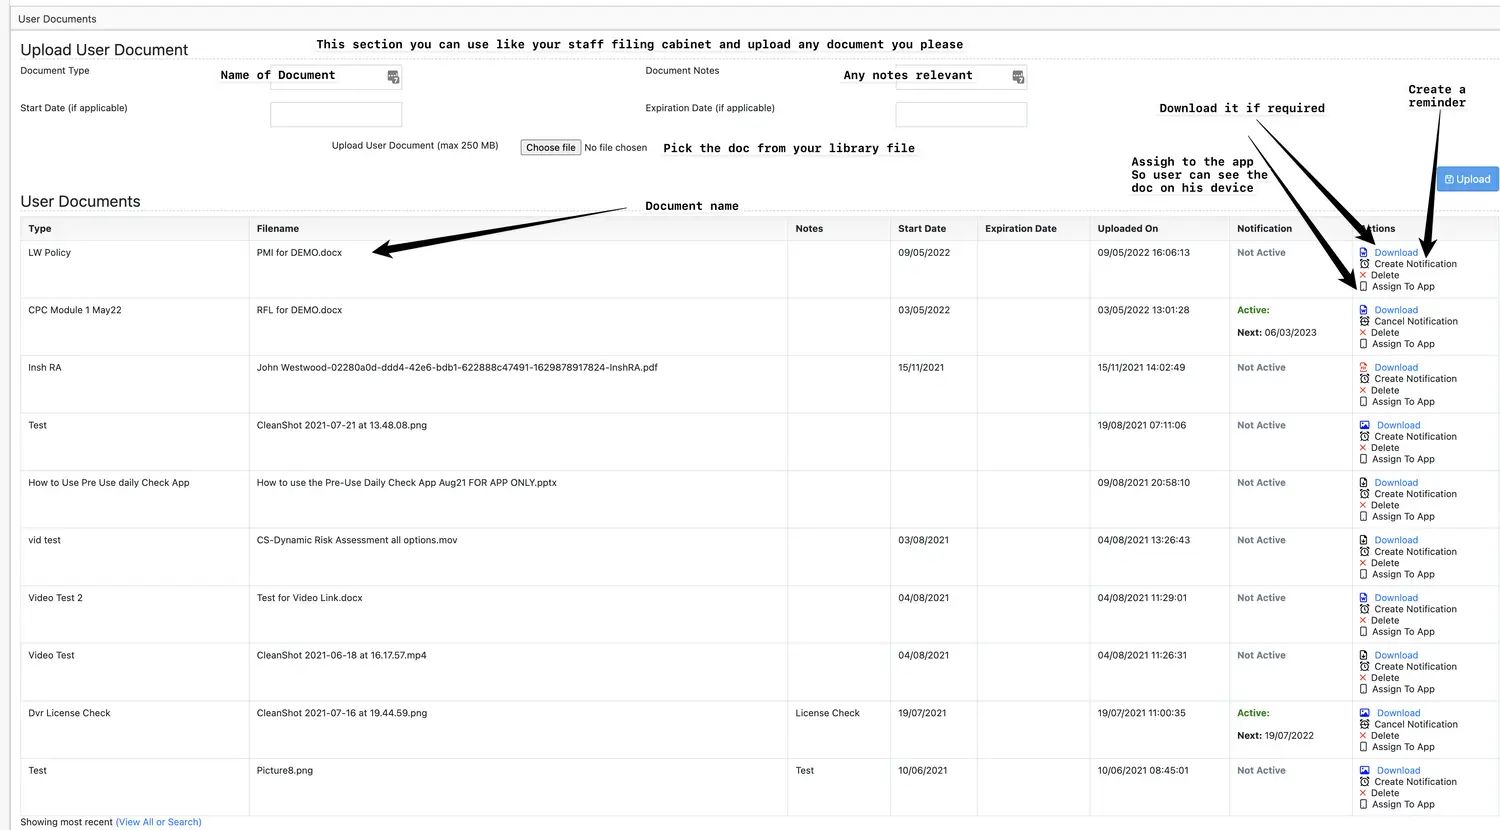
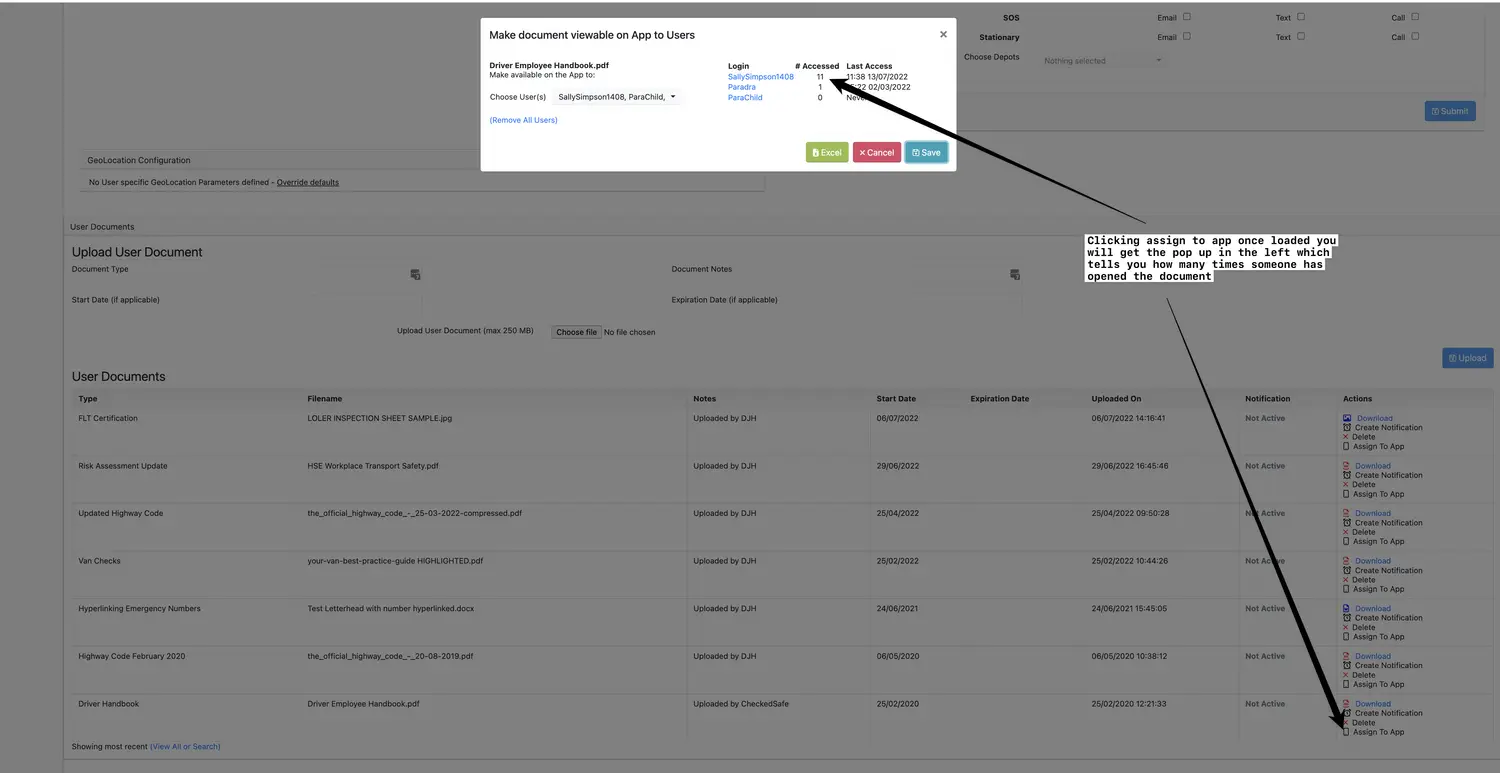
Once assigned to the app the user has full access to whatever you have loaded. To check if they have opened it click the “assign to App” in the user profile and it will tell you how many times it has been opened. You can upload Word, Excel, PNG, JPG, PDF and MP4 videos.
If you wish to load the same doc/vid to lots of users, create a unique profile for example and load all the core documents to that profile and send out to all from that profile – this is an easy way to manage the process.